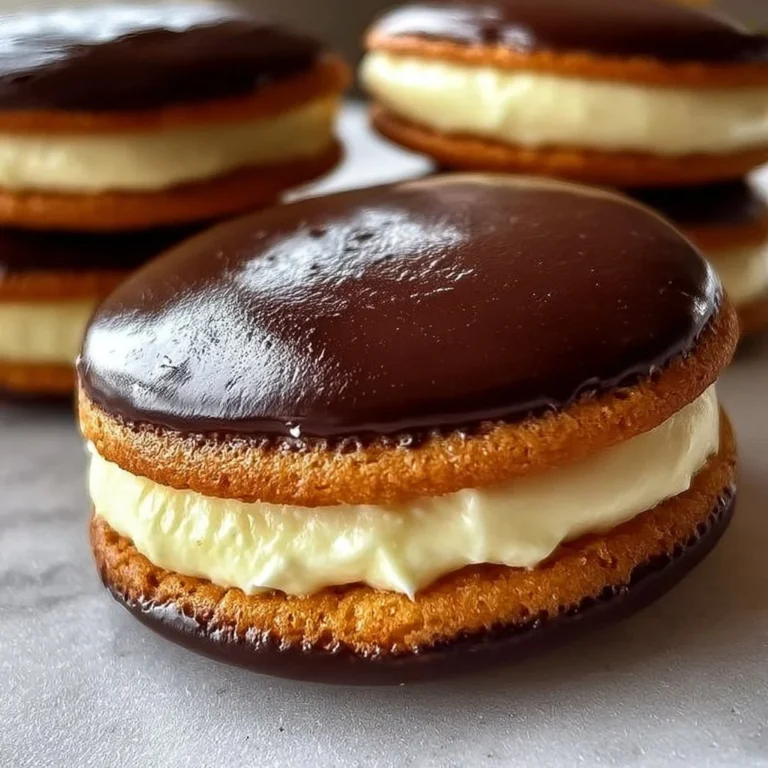
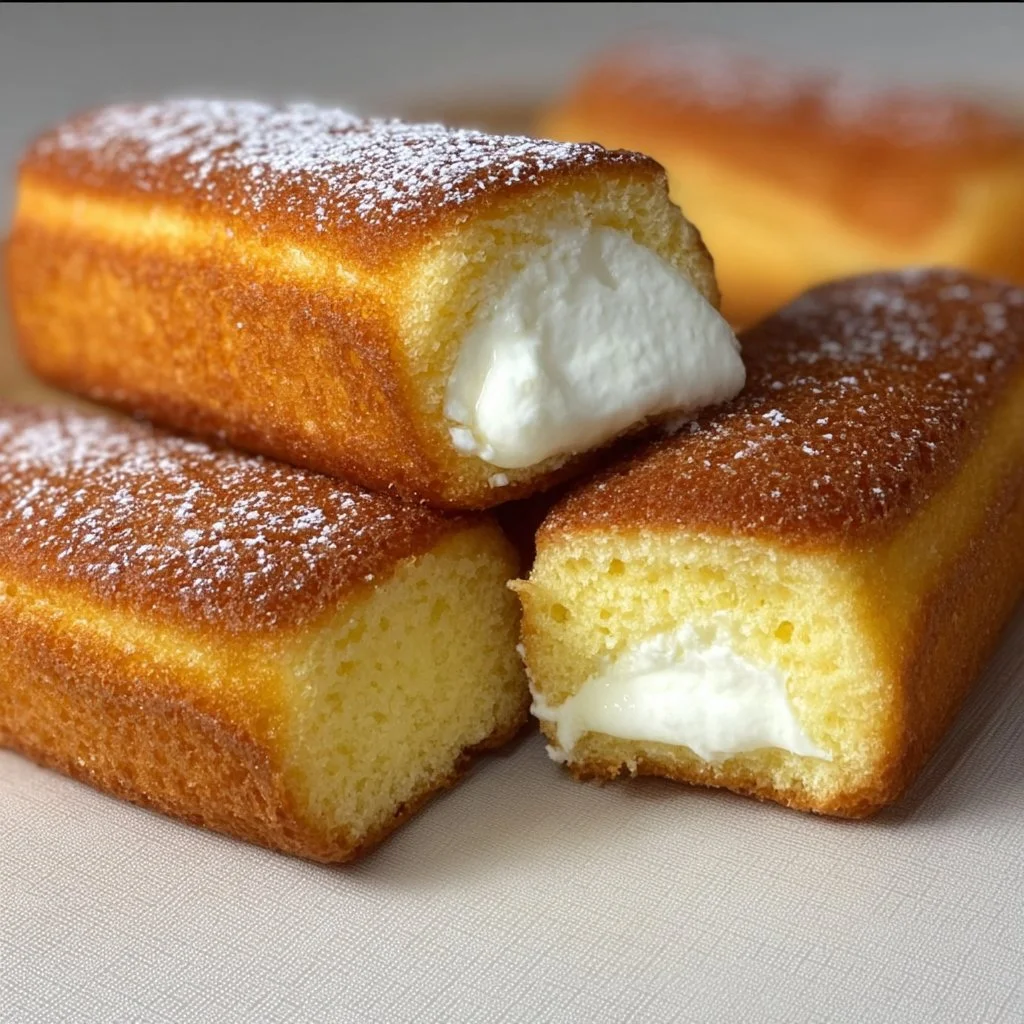
Homemade Twinkies

While we have provided a jump to recipe button, please note that if you scroll straight to the recipe card, you may miss helpful details about ingredients, step-by-step tips, answers to common questions and a lot more informations that can help your recipe turn out even better.
I believe snacks are political. Also, I believe the best comfort comes in a yellow sponge that’s been lovingly assaulted by a cloud of cream. This is my hill to die on, and yes — I will fight you for a Twinkie. (Also no, this is not the same as the one in the vending machine in my high school from 2003; that one had… character.)
You know when a cultural moment hits — like suddenly every bakery is pretending to sell nostalgia — and you think, fine, I’ll make my own? That’s how I ended up making Homemade Twinkies in my pajamas at 2 a.m., crying because the batter looked like sad baby food. Also because my cat judged me.
A Very Specific Disaster (and I Smell Like Burnt Sugar)
The first few times I tried to make these, they were legitimately wrong. Like, smelled-like-the-inside-of-a-school-gym wrong. The texture was spongy in all the wrong ways — dense, gummy, like a pillow that had been sat on for a decade. The sound they made when I squeezed them? A shameful little sigh. I once underbaked one batch and the middles collapsed into a puddle of regret. Another time the filling separated into something resembling whipped sadness and carwash foam.
Embarrassment is an aroma, right? There was a faint chemical note of baking powder and too-much-vanilla that clung to my sweater for days. I told myself it was character. Then I told myself it was a fire hazard. I kept experimenting (obsessively, loudly), and honestly I consider that half the fun — except when it isn’t. Also: do not let the dog taste-test the batter. He will look at you like you failed as a person.
Why This Version Finally Works (and why I almost changed my mind halfway)
What changed? Patience (a tiny miracle), lower oven trust issues resolved, and a surrender to simplicity. I stopped trying to reinvent Twinkies like they were a molecular gastronomy project and instead treated them like a sponge cake that wanted to be fluffy, not a science fair volcano. I also learned how to not overmix and — crucially — to let the cakes cool completely before filling. Wild concept, I know.
Emotionally: I stopped panicking whenever a toothpick came out with a crumb. Practically: the pan, the right balance of baking powder and baking soda, and whipping the cream until it actually looked proud instead of like a melt-prone cumulus cloud. This version of Homemade Twinkies tastes like childhood and like adulthood combined; confusing, but comforting. I’m proud, but also suspicious that I’ll tweak it again next week.
Also, for those of you who complain — yes, you can use a regular muffin tin in a pinch. I said I’d never substitute but then I did. We evolve.
Ingredients
- 1 cup all-purpose flour
- 1 teaspoon baking powder
- 1/2 teaspoon baking soda
- 1/4 teaspoon salt
- 1/2 cup granulated sugar
- 1/4 cup unsalted butter, softened
- 1 large egg
- 1 teaspoon vanilla extract
- 1/2 cup milk
- 1 cup heavy cream
- 1/4 cup powdered sugar
- 1 teaspoon vanilla extract (for cream filling)
Cheap to make, great texture if you beat the cream properly, and only slightly dependent on the availability of a Twinkie pan — which you don’t strictly need if you’re improvisational (or lazy).
Cooking Unit Converter
If you’re measuring like me — by eye and emotion — here’s something to help translate panic into grams and cups.
How to Actually Make Them (but I will interrupt you a lot)
- Preheat the oven to 350°F (175°C). Grease a Twinkie pan.
- In a mixing bowl, sift together the flour, baking powder, baking soda, and salt.
- In another bowl, beat the sugar and butter until creamy. Add the egg and vanilla, mixing well.
- Gradually add the dry ingredients and milk alternately, mixing just until combined.
- Pour the batter into the prepared pan, filling each cavity about 2/3 full.
- Bake for 15-18 minutes, or until a toothpick comes out clean.
- Allow cooling for a few minutes before transferring to a wire rack to cool completely.
- For the filling, whip the heavy cream with powdered sugar and vanilla until stiff peaks form.
- Once the cakes are cool, fill with the whipped cream using a piping bag.
- Enjoy your homemade Twinkies!
Non-linear thoughts: sometimes the batter looks wrong and then it isn’t; sometimes the oven lies; tip — cool them fully unless you like gooey regrets. If you don’t have a piping bag, use a zip-top bag with the corner snipped (yes, that’s a kitchen hack I stole from a neighbor). AND REMEMBER: taste as you go. Is that a crime? Maybe.
Do You Also Have Children, Plants, or a Tiny Inner Critic?
Are you the kind of person who makes a schedule and then immediately breaks it? Me too. Who eats half a Twinkie before dinner and calls it research? Also me. Did you ever have a grandma who swore that every sponge cake needed more butter and also less butter at the same time? Share that energy.
Have you tried filling pastries and then panicking and jamming the filling in with a spoon? What a vibe. Tell me — do you hide your baking disasters in the back of the freezer? Because that’s my archive. If you like procedural nostalgia, here’s a recipe that gives similar warm-fuzzies to my pumpkin cinnamon roll recipe, and if you’re into stabilized fillings (I am, we are), a trick I nicked from my cream pie experiments helped me stop the ooze. Also — speaking of pies and dramatic kitchens — consider a strawberry pie for morale boosting. I may have made one as a coping mechanism once: that strawberry pie.
Yes. Bake, cool completely, and store in an airtight container for a day. Don’t fill until right before serving if you want the texture to stay crisp-ish.
Absolutely. A hand mixer works fine; just watch the peaks. Nobody wants runny filling or butter.
Use a muffin tin or even a loaf pan and cut into bars — still delicious, just visually rebellious.
You can freeze the cakes (unfilled) for up to a month; thaw and fill when ready. Don’t freeze filled Twinkies unless you like textural surprises.
No, and thank goodness. This tastes fresher, less industrial, and more like you made a deliberate life choice. You’ll be proud and slightly hyper.
I keep getting sentimental about snack cakes (weird flex, I know) — maybe because they’re small, forgiving, and unapologetically cheerful. Making them felt like reclaiming a memory, or inventing one. Either way, there was flour on the floor, a tiny triumph in my chest, and then I saw a squirrel outside and went to check the mail and forgot to wash the bowl because the dog wanted attention and—
Daily Calorie Needs Calculator
Wondering what one (or three) Twinkies does to your daily plan? This will help translate indulgence into numbers.

Homemade Twinkies
Ingredients
For the Twinkie Cakes
- 1 cup all-purpose flour
- 1 teaspoon baking powder
- 1/2 teaspoon baking soda
- 1/4 teaspoon salt
- 1/2 cup granulated sugar
- 1/4 cup unsalted butter, softened
- 1 large egg
- 1 teaspoon vanilla extract
- 1/2 cup milk
For the Cream Filling
- 1 cup heavy cream
- 1/4 cup powdered sugar
- 1 teaspoon vanilla extract for cream filling
Instructions
Preparation
- Preheat the oven to 350°F (175°C). Grease a Twinkie pan.
- In a mixing bowl, sift together the flour, baking powder, baking soda, and salt.
- In another bowl, beat the sugar and butter until creamy. Add the egg and vanilla, mixing well.
- Gradually add the dry ingredients and milk alternately, mixing just until combined.
- Pour the batter into the prepared pan, filling each cavity about 2/3 full.
- Bake for 15-18 minutes, or until a toothpick comes out clean.
- Allow cooling for a few minutes before transferring to a wire rack to cool completely.
Filling
- For the filling, whip the heavy cream with powdered sugar and vanilla until stiff peaks form.
- Once the cakes are cool, fill with the whipped cream using a piping bag.
Serving
- Enjoy your homemade Twinkies!